Key Takeaways
- Choose colors after evaluating the flooring, cabinetry, counters, furniture, and tile that will remain in the room.
- Test paint samples on large boards or wall areas and view them in daylight and artificial light.
- Match paint sheen to the room’s traffic level, moisture exposure, and cleaning needs.
- Use related undertones and repeat selected colors to create a connected whole-home palette.
- Prepare walls carefully because paint will not fully hide stains, cracks, dents, or uneven textures.
- Use ventilation and follow product-label directions throughout an indoor painting project.
Paint Rarely Looks the Same at Home
A paint color that looks perfect on a phone screen or small paper chip can look very different on an actual wall. Window direction, daylight, lightbulb temperature, shadows, room size, trim color, and nearby furnishings all affect what the eye sees. That is why many homeowners choose to work with interior painting contractors when they want help turning a color idea into a finished room that feels cohesive.
The best choice is not simply the most popular color. It is the color and finish that work with the room’s permanent features, intended use, lighting conditions, and maintenance demands. A thoughtful process can prevent expensive repainting and help every room feel intentional rather than disconnected.
Start With the Features That Are Staying
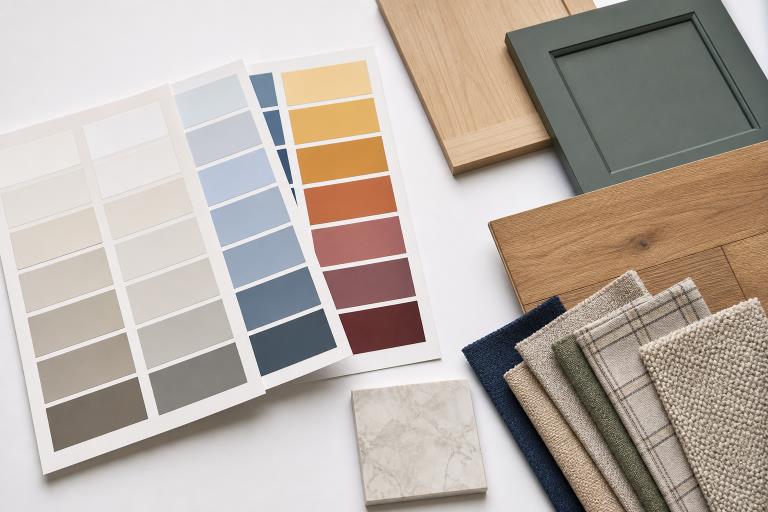
Before looking at paint decks, identify the elements you are not replacing. These may include wood or tile flooring, countertops, cabinetry, a fireplace surround, backsplashes, rugs, and large upholstered furniture. Paint is flexible, but those fixed materials often establish the color direction for the entire room.
Pay close attention to undertones. A neutral beige may lean yellow, pink, gray, or green, while a white may appear creamy, crisp, cool, or slightly gray. For example, a blue-gray paint can appear greener when it sits beside warm honey-colored wood flooring. Bring photos, fabric swatches, cabinet samples, or a tile piece when comparing potential colors.
Match Color to the Room’s Purpose
Color helps establish the visual character of a space. Bedrooms often suit softened blues, greens, grays, warm whites, or muted earth tones because these shades can create a quieter setting. Living rooms and dining areas can accommodate warmer neutrals, richer greens, dusty blues, or deeper accent colors that make the space feel more welcoming.
Playrooms, hobby rooms, and creative workspaces may be good places for brighter colors, especially on a single wall, built-in shelving, or a painted door. Personal preference should still lead the decision. A homeowner who loves a dramatic charcoal or saturated teal does not need to avoid it, but should test it carefully and consider how it connects to adjacent spaces.
Build a Whole-Home Color Plan
Every room does not need identical walls. In fact, using one color everywhere can make a home feel flat. Instead, create continuity by selecting a small family of colors with compatible undertones. This is especially useful in open floor plans and hallways where multiple rooms are visible at once.
- Choose a main neutral or background color for central spaces.
- Select one or two supporting colors for bedrooms, offices, or secondary rooms.
- Add a deeper accent color for a feature wall, built-ins, interior doors, or selected trim.
- Stand in doorways and sightlines to check how each color works with nearby rooms.
Use Natural Light as a Design Tool
Light changes throughout the day, so sample paint should be viewed in the morning, afternoon, and evening. Rooms with strong direct sun can make some colors appear brighter or washed out, while dim rooms may make the same shade look heavier. The way windows and skylights bring daylight into a room also affects glare, warmth, and perceived color, which is part of the broader concept of using natural light through window placement and interior design.
Paint sample boards are often more useful than tiny chips. Apply two or three finalist colors to separate large boards, then move them around the room near windows, trim, flooring, and major furniture. Let samples dry fully before comparing them, since wet paint can look different from the cured color.
Choose the Right Paint Finish
Sheen refers to how much light a paint finish reflects. In general, higher-sheen paints are easier to wipe clean, while lower-sheen paints reduce glare and can make minor wall imperfections less noticeable. A higher sheen can also make dents, patches, and uneven texture more visible.
- Flat or matte: A practical starting point for ceilings and low-traffic rooms. It offers a soft appearance and minimizes reflected light.
- Eggshell: Well-suited to many bedrooms, living rooms, and dining rooms where homeowners want a subtle sheen with moderate cleanability.
- Satin: Often useful in hallways, family rooms, kitchens, and other active areas that may need more frequent wiping.
- Semi-gloss: Commonly used on trim, doors, bathrooms, and selected kitchen surfaces because it handles moisture and cleaning well.
Always check the manufacturer’s recommendations for the specific paint and surface. A finish that works well on drywall may not be the best option for cabinets, trim, or previously painted surfaces.
Room-by-Room Paint Planning
Living Rooms and Bedrooms
In a living room, start with the largest visual elements, such as flooring and furniture. Warm neutrals, muted greens, soft blues, and earthy shades can all work well when they support those materials. In bedrooms, review samples under daytime and nighttime lighting because bedside lamps can change the appearance of a wall color considerably.
Kitchens, Bathrooms, and Laundry Rooms
Kitchens need colors that coordinate with cabinets, counters, backsplashes, and appliances. Satin finishes are often a practical option for busy wall areas. Bathrooms and laundry rooms require additional attention to moisture and cleaning needs, so use a paint formulated for interior use and select a finish appropriate for humid conditions.
Hallways, Entries, and Home Offices
Hallways and entryways receive frequent contact from people, bags, pets, and moving furniture, making a durable, washable finish helpful. Their colors can also serve as a bridge between nearby rooms. In a home office, consider screen glare, the location of windows, and how the wall behind a desk may appear during video calls.
Prepare the Surface Before Painting
Color and sheen cannot compensate for poor preparation. Clean walls, patch holes and cracks, sand rough repairs, caulk gaps where appropriate, and prime stains or repaired areas when needed. Address moisture problems before painting rather than covering them with a fresh coat.
Older homes need extra care. If a home was built before 1978, treat existing painted surfaces as potentially containing lead unless testing shows otherwise. The EPA outlines lead-safe preparation and ventilation practices during remodeling work, particularly when sanding, scraping, or disturbing old paint.
Plan for Safer Indoor Painting
Provide fresh airflow when conditions permit, use exhaust fans or open windows as appropriate, and follow every product label. Review low-VOC and zero-VOC claims carefully because formulas differ by product. Keep children, pets, and sensitive household members away from active work areas until the project is complete and the space has been adequately ventilated.
Final Paint Selection Checklist
- Does the color coordinate with fixed finishes and large furnishings?
- Has it been tested on a large sample area in real lighting?
- Does it work with the colors visible from adjacent rooms?
- Does the finish suit the room’s traffic, moisture, and cleaning needs?
- Have wall repairs, cleaning, and priming been completed before painting?
A successful interior paint plan balances appearance, function, lighting, surface condition, and upkeep. When colors are tested carefully, and finishes are chosen for the way each room is used, the result can look polished on day one and remain practical for years to come.