Key Takeaways
- Begin with daily routines and practical needs before selecting plants or furniture.
- Use clear zones for dining, relaxing, gardening, and circulation.
- Plan around Woodinville’s wet-season drainage, changing light, and mature vegetation.
- Choose plants and materials that fit the site and remain manageable over time.
- Include water management, storage, lighting, and maintenance in the first design plan.
A well-planned yard should make everyday life easier, whether that means a dry path to the back door, a comfortable patio for evening meals, or planting beds that do not demand constant attention. Homeowners working with a Woodinville landscape designer can start by identifying how they want to use the property throughout the year, rather than building the design around a single feature. In Woodinville, outdoor spaces often need to handle rainy months, summer dry spells, tree shade, sloped lots, and the desire for privacy without making a yard feel enclosed. A practical landscape balances those conditions with the household’s available time, budget, and long-term maintenance preferences.
Start With Daily Life, Not a Shopping List
Attractive outdoor spaces can still be inconvenient if furniture blocks circulation, seating receives too much afternoon sun, or garden beds are difficult to reach. Before choosing pavers, shrubs, or a fire feature, write down the activities the area should support.
- Morning coffee near a sunny doorway
- Outdoor meals close to the kitchen
- Quiet reading in a sheltered corner
- Family gatherings with flexible seating
- Raised beds or containers near a water source
- Safe, visible play space for children or pets
Prioritize one or two main uses. A compact backyard can feel more generous when it has a clear purpose and enough open space to move comfortably, instead of trying to accommodate every possible activity.
Step 1: Study the Site Before Making Major Changes
Measure the usable area and sketch permanent features, including doors, windows, fences, utilities, existing trees, slopes, downspouts, and paved surfaces. Then observe the yard at different times of day. Sun exposure can vary significantly between an open patio and a planting bed beneath established evergreens or deciduous trees.
Watch How Water Moves
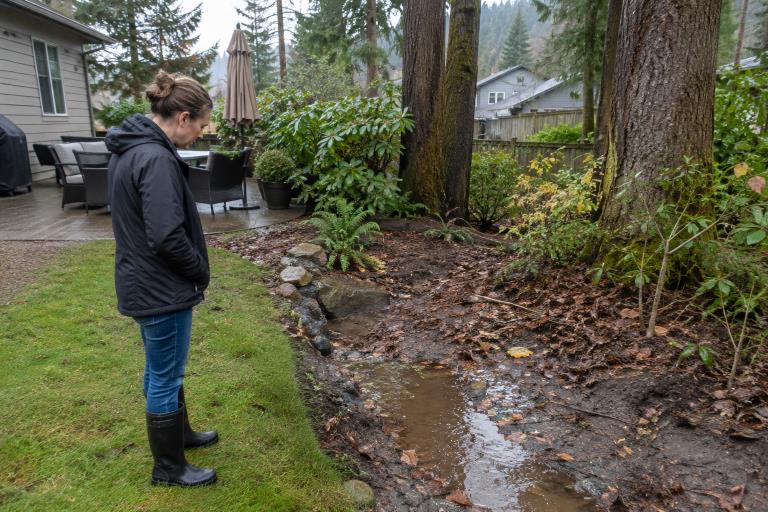
During or after a steady rain, note where water collects and where it leaves the property. Poor drainage can create muddy lawn areas, stress plants, and affect the performance of patios, paths, and retaining features. Take photos both indoors and outdoors, since the view through frequently used windows should be part of the design.
Step 2: Create Simple Outdoor Zones
Divide the yard into connected areas rather than treating it as one undefined space. Put dining close to the kitchen or grill area, place lounging where shade and privacy are available, and locate gardening near a hose connection. If children use the yard, position play areas where adults can see them from the home or main seating area. Keep paths direct and wide enough for their intended use. Leave clearance around chairs, tables, planters, gates, and grills so people can move without squeezing through. Even a modest path can make a backyard more usable during wet weather when walking through planted beds or across a saturated lawn is less appealing.
Step 3: Select Plants for the Actual Conditions
Plant selection should follow the site review. Check each plant’s mature height and width, light requirements, moisture needs, and seasonal appearance before planting. Layering trees, shrubs, grasses, perennials, and groundcovers can create depth while helping define seating areas and soften fences. Use the USDA Plant Hardiness Zone Map as one starting point for perennial plant choices, but do not treat it as a complete planting guide. Soil drainage, wind exposure, winter sun, summer heat, and small microclimates around walls or pavement also affect whether a plant will thrive. Group plants with similar watering needs, and avoid crowding them to make new beds look full. Giving plants room to reach mature size reduces future pruning, improves access for weeding, and helps preserve the intended shape of the landscape.
Step 4: Design for Lower Maintenance
Low maintenance does not mean maintenance-free. It means reducing recurring work through sensible layout choices. Avoid narrow lawn strips that are difficult to mow; use durable edging to keep mulch and soil contained; and place beds where they can be tended without stepping through them.
- Use mulch in planting beds to help conserve soil moisture and limit weed growth.
- Choose groundcovers only where they match the light, soil, and foot-traffic conditions.
- Include convenient storage for hoses, cushions, hand tools, and seasonal items.
- Use fewer, repeatable materials to make the design feel cohesive and easier to repair.
Step 5: Plan Water, Drainage, and Surfaces Together
Water should be directed away from the home and toward appropriate drainage areas. Depending on the site, grading, planted swales, permeable paving, or carefully placed planting beds may help slow and guide runoff. Any drainage change should account for property lines, existing utilities, and the safe path water will take during heavier storms. A water-wise plan also considers irrigation. Drip systems can deliver water directly to planted areas, while weather-responsive controls can help avoid unnecessary watering when conditions do not require it. The EPA’s guidance on water-smart landscape design reinforces the value of planning plant placement, irrigation, and maintenance as a single, integrated system.
Step 6: Choose Materials That Fit the Property
Material selection should reflect budget, drainage needs, style, durability, and expected upkeep. Concrete can create a clean, durable surface, but may develop cracks over time. Pavers allow localized repairs and offer many layout options. Natural stone provides variation and character, while gravel can suit informal paths but may shift and spread. Wood adds warmth but requires ongoing care, while composite products may reduce maintenance requirements. Limit the palette to two or three primary materials. Repeating a paving color, edging material, or wood tone can visually connect the patio, pathways, planting areas, and the home itself.
Step 7: Build in Comfort for Every Season
Shade, privacy, and lighting determine whether an outdoor area gets used beyond a few ideal days. Use trees, pergolas, umbrellas, screens, or layered planting to provide shelter where people sit most often. Preserve desirable views when possible, rather than screening every boundary with a solid wall of vegetation. For evenings, combine practical lighting near steps, entrances, grills, and paths with softer illumination around seating. Aim fixtures carefully to reduce glare and avoid shining bright light toward neighboring homes. A few well-placed lights are generally more inviting than an overly bright yard.
Common Planning Mistakes To Avoid
- Buying furniture before measuring the patio or deck.
- Ignoring drainage until after the new hardscape is installed.
- Choosing plants only for color, without considering mature size or site conditions.
- Adding too many competing materials, features, or focal points.
- Forgetting storage and access for routine maintenance.
- Designing for summer only, without considering rain, shade, and winter views.
Final Planning Checklist
Define the space’s main purpose, measure the site, observe sun and drainage patterns, and note existing trees, slopes, access points, and privacy concerns before making major decisions. Sketch zones and circulation so dining, relaxing, gardening, and other activities have enough room to function comfortably. Select plants based on their mature size, sunlight needs, water needs, and maintenance requirements, then choose durable materials that can withstand local weather and everyday use. Plan water management, lighting, storage, irrigation, and maintenance access before construction begins rather than trying to add them later. A thoughtful plan can turn a Woodinville yard of nearly any size into a comfortable extension of the home, with spaces that are easier to use, maintain, and adapt as household needs change. Taking these details into account early can also help reduce costly changes and keep the finished landscape practical long after the first season.