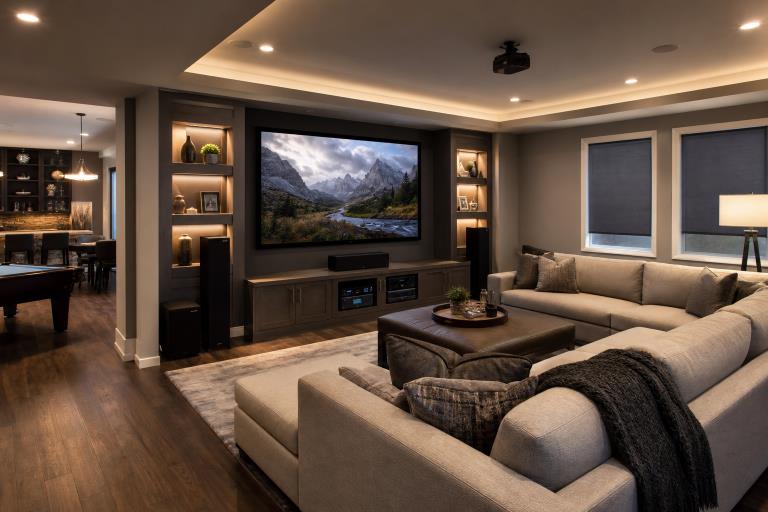
A flexible home entertainment room should make everyday viewing easy while still feeling special for movie nights, games, music, and gatherings. The best results come from planning the room around how people actually live, not around a single oversized screen or complicated stack of components. Working with experienced audio experts can also help homeowners translate broad ideas into practical choices for layout, sound, lighting, and controls.
A family room, bonus room, basement, or den can serve several roles without becoming cluttered or difficult to use. With thoughtful infrastructure and a few adaptable decisions, the same space can host daytime sports, a child’s gaming session, relaxed background music, and an immersive evening film.
Why Flexible Entertainment Rooms Make Sense
A dedicated theater can be wonderful, but it is not the only way to enjoy high-quality entertainment at home. Many households need a room that can shift between movies, streaming shows, console gaming, casual music, sports viewing, and conversations with guests. Designing for flexibility keeps the room useful more often.
For example, a family room may be bright and active on a Saturday afternoon, with shades open for a game and seating arranged for conversation. That same room can become a movie space after dark, when the lights dim, the shades close, and the audio system switches to a cinematic setting. The goal is not to make every moment feel like a commercial theater. It is to remove the obstacles that keep people from using the room.
Step One: Define How The Room Will Be Used
Before comparing screens or speakers, write down the activities the room must support. Consider what the household watches most, how many people usually use the room, and whether gaming, music, work, exercise, or entertaining guests must fit into the plan.
Questions To Ask
- Will the room be used primarily during the day, at night, or both?
- Do people sit in one main position, or will they spread across a sectional or several chairs?
- Will children or guests need to operate the system without help?
- Could the room’s role change within the next few years?
These answers establish realistic priorities. A movie-focused basement may benefit from controlled lighting and surround sound speakers, while a busy living room may prioritize quick startup, strong daytime picture quality, and discreet equipment storage.
Step Two: Choose Between A TV And A Projector
A television is often the practical choice for bright rooms, frequent short viewing sessions, news, and sports. It starts quickly, generally handles ambient light well, and fits comfortably in limited viewing distances. A projector can be more compelling when the priority is a large image for films or group viewing, and the room can be darkened when needed.
Projector placement has also become more adaptable, with ultra-short-throw, portable, and adjustable models expanding the options for rooms that cannot accommodate a traditional ceiling-mounted unit. Recent projector developments shown at CES 2026 illustrate how flexible placement and home-friendly designs continue to evolve. Still, evaluate the actual wall, screen location, lighting, and seating distance before deciding.
Step Three: Plan The Layout Before Buying Equipment
Measure the room’s length, width, ceiling height, windows, doors, and walking paths. Mark the likely screen wall and seating positions, then check whether every seat has a comfortable sightline. Keep the main seat away from the back wall when possible, since sitting directly against a wall can make bass feel uneven and surround effects less convincing.
- Mount or place the screen at a comfortable height, not simply as high as the wall allows.
- Leave room for speaker locations, equipment ventilation, and service access.
- Identify glare from windows and fixtures before installing the display.
- Plan storage for remotes, game controllers, headphones, and charging cables.
Step Four: Build A Strong Audio Plan
Clear dialogue and balanced sound usually matter more than maximum volume. Place the center speaker near the screen so voices seem connected to the picture. Keep the left and right speakers at similar heights and distances from the main seats, where practical. Surround speakers should create a sense of spaciousness without calling attention to themselves.
Subwoofer placement deserves experimentation because room boundaries can create boomy or weak bass in different seats. Hard floors, bare walls, and large windows may also create echo, so rugs, upholstered furniture, curtains, and purpose-built acoustic treatment can improve clarity. Modern receivers increasingly combine movie and game switching with streaming and multi-room audio features, as seen in this report on more adaptable AV receiver designs.
Step Five: Plan Wiring And Network Connections
Hidden infrastructure is easiest to install before walls are closed or furniture is in place. Provide cable paths for the display, speakers, network devices, and controls. Leave extra conduit or accessible routes for future changes, label both ends of every cable, and keep power wiring separate from low-voltage signal wiring when practical.
Use wired network connections for fixed devices when reliable streaming and gaming matter. Also, provide enough outlets near the display and equipment cabinet, and ensure adequate ventilation for receivers, consoles, media players, and network gear. Common mistakes include sealed cabinets, too few outlets, inaccessible cables, and assuming wireless connections will solve every placement issue.
Step Six: Add Lighting That Supports Each Activity
Create separate lighting zones rather than relying on one bright ceiling fixture. Dimmable lighting supports movies and gaming, while task lighting helps with snacks, reading, and board games. Shades or curtains can limit screen glare, and low-level pathway lighting makes it safer to move around during a film without washing out the picture.
Step Seven: Make Controls Simple
A room becomes frustrating when users must manage several remotes, apps, and input menus. Group common actions into straightforward choices such as “Watch Movie,” “Play Game,” “Listen To Music,” and “Watch Sports.” Use clear labels, keep daily controls easy to find, and retain a basic manual option if the network is unavailable. Test the setup with someone who did not install it.
Match The System To The Room And Prepare For Upgrades
Small rooms benefit from compact speakers, clear dialogue, and low-glare displays. Medium rooms can often support fuller surround layouts and several seating positions. Large rooms need careful attention to speaker coverage, bass consistency, and reflections, sometimes including multiple subwoofers or acoustic treatment.
Future-proofing does not mean buying the most expensive equipment. It means leaving spare cable capacity, choosing furniture that allows airflow, changing equipment sizes, documenting connections, and organizing manuals, passwords, and firmware information. These simple steps make later upgrades manageable instead of disruptive.
Final Checklist
- Room uses are clearly defined.
- The screen type fits the lighting and seating distance.
- Viewing angles and speaker locations are practical.
- Wiring, network access, outlets, and ventilation allow future changes.
- Lighting supports both entertainment and everyday living.
- Controls are easy for every user.
Conclusion
A flexible home entertainment room does not need to be complicated. It needs to reflect real habits, real space, and real people. When layout, sound, lighting, wiring, and controls work together, one room can handle many kinds of entertainment while remaining comfortable, reliable, and easy to enjoy.