Key Takeaways
- Start with business needs, lease terms, and building conditions before selecting finishes.
- Include design, permits, technology, furniture, moving, and contingency funds in the budget.
- Set decision deadlines early because late changes can affect pricing, permits, and move-in timing.
- Use the final walk-through to document incomplete work before employees occupy the space.
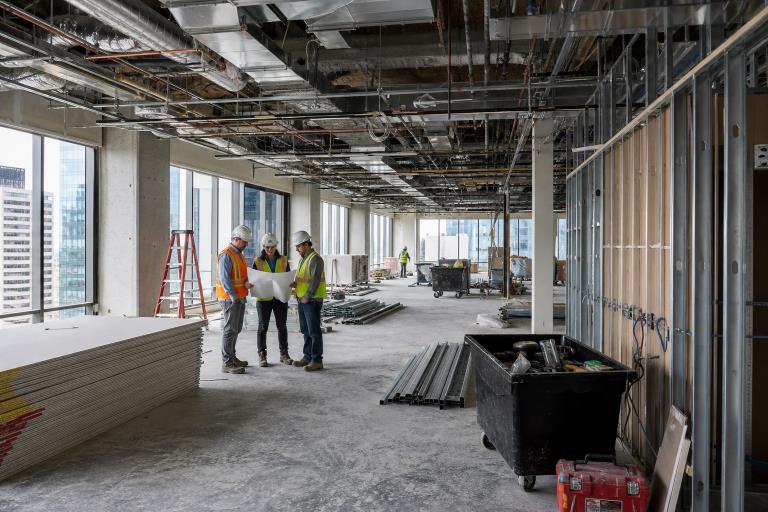
A commercial office build-out is more than a construction project. It is a coordinated process that turns a leased space into a workplace that supports the way people actually work. From the first site visit through final inspections, this resource can help teams understand the planning considerations involved in shaping a functional commercial environment. The strongest projects begin before design drawings are created. Businesses should define their goals, review the lease, understand building rules, and identify operational needs before making decisions about colors, furniture, or finishes. This early work can reduce expensive revisions later and create a more dependable path to move-in.
Why Office Build-Out Planning Starts Before Design
Every office should reflect the organization that uses it. A growing legal practice may need private rooms, secure files, and stronger sound control. A creative team may need flexible project areas, large worktables, and spaces for informal collaboration. Headcount, attendance patterns, client visits, storage, equipment, and future growth should all shape the plan. Before approving a layout, review the lease alongside tenant improvement terms, landlord requirements, building access rules, and existing site conditions. A visually appealing concept can become impractical if the required plumbing, electrical capacity, air distribution, or exit routes cannot support it.
Step 1: Define How The Space Must Work
Translate daily operations into a short requirements list before design begins. This provides a practical foundation for the layout and budget.
- Count employees and estimate typical daily occupancy.
- Identify the number of private offices, workstations, meeting rooms, and phone rooms required.
- List reception, break room, mail, printing, storage, and equipment needs.
- Identify secure areas, client-facing rooms, or specialized production support.
- Consider growth plans so the space does not become restrictive too quickly.
Step 2: Review The Existing Space
A thorough site review prevents the plan from overlooking constraints hidden above ceilings, behind walls, or inside utility rooms. Confirm electrical capacity, outlet locations, HVAC zones, plumbing access, ceiling heights, windows, daylight, glare, fire exits, accessibility routes, and existing cabling. Also, examine existing walls, flooring, lighting, life-safety systems, and mechanical equipment. These conditions may affect where enclosed rooms can go, how many workstations the space can support, and whether upgrades are needed before occupancy.
Step 3: Build A Realistic Office Budget
A complete budget should separate the major cost groups rather than rely on a single broad allowance. Include design and planning, demolition, walls and doors, finishes, electrical work, plumbing, HVAC, data cabling, security, audiovisual systems, furniture, permits, professional fees, moving, cleaning, and temporary storage. Keep a contingency fund for hidden conditions and approved changes. Ask whether each estimate includes labor, materials, tax, delivery, permits, and after-hours work. A rough allowance is useful during early planning, but a detailed estimate is needed before final approvals.
How Tenant Improvement Funds Fit Into The Plan
A tenant improvement allowance may offset eligible construction expenses, but the lease controls how those funds can be used. Review which hard costs qualify, whether design or permit fees are covered, whether furniture or technology is eligible, and when invoices must be submitted. Create a written allowance schedule before final selections are made.
Step 4: Create A Layout That Supports Different Work Modes
Good office layouts account for focused work, teamwork, private conversations, visitor needs, and everyday support functions. Include quiet focus areas for calls and concentrated tasks, team zones for collaboration, client spaces that protect privacy, recharge areas away from active work zones, and support areas for supplies and equipment. Circulation matters as much as room count. Keep noisy traffic paths away from quiet rooms, place shared resources where they are convenient, and avoid using every available square foot for desks. Employees need room to move, meet, store materials, and work without unnecessary interruptions.
Step 5: Plan For Sound, Light, And Comfort
Comfort influences how usable the office feels after move-in. Use sound-absorbing ceilings, flooring, wall panels, and furnishings where noise is likely to travel. Locate phone rooms and meeting spaces near active areas when possible, while protecting quieter zones from constant foot traffic. Layer ambient, task, and accent lighting rather than relying on a single bright ceiling light. Control window glare near screens, review temperature zones before placing dense workstation areas, and choose furniture that supports a range of users. OSHA guidance on lighting, glare, and ventilation can help teams account for practical workstation comfort during planning.
Step 6: Coordinate Technology Before Walls Close
Technology should be part of the initial design process. Map the locations of desks, conference tables, displays, printers, wireless access points, security devices, and network hardware before construction begins. Plan power and data connections for current equipment and reasonable future needs. Late technology decisions often require extra drilling, patching, labor, and schedule adjustments. Confirm cable pathways, equipment-room requirements, wireless coverage, and video meeting needs before walls and ceilings are completed.
Step 7: Prepare Construction Documents, Permits, And The Schedule
After the space plan is approved, prepare the architectural and engineering drawings, submit them to the landlord for review, address any comments, and file for the required permits. Inspections should be scheduled throughout construction, not only at the end. Permit requirements and review periods vary by jurisdiction, building type, and project scope. Build the project schedule around decisions as well as construction tasks. Set dates for finish selections, furniture orders, signage, technology approvals, material purchasing, and change requests. One delayed decision can affect multiple trades and put the move-in date at risk.
Common Office Build-Out Mistakes
- Starting work before the scope, budget, and building rules are clear.
- Leaving technology, furniture, or moving costs out of the first budget.
- Ignoring acoustics, durability, storage, or circulation until late in the project.
- Ordering long-lead materials and furniture too late.
- Making repeated changes after permits are submitted.
- Skipping a detailed closeout and punch-list process.
Final Walk-Through And Move-In Readiness
The final walk-through should be a detailed review, not a quick tour. Check doors, locks, access control, lighting, outlets, HVAC performance, plumbing fixtures, finishes, signs, network systems, audiovisual equipment, cleaning, warranties, and operating manuals. Document open items with photos, assigned owners, and completion dates before the team moves in.
Conclusion
A successful office build-out connects business needs with the lease, building conditions, budget, technology, schedule, and employee experience. Clear requirements and timely decisions reduce avoidable surprises, costly changes, and delays during construction. Early coordination between the business, designers, contractors, landlords, and building teams also helps identify technical or compliance issues before they become larger problems. When planning is handled carefully from lease signing through final handover, the finished office is more likely to support productive work today, provide a comfortable environment for employees and visitors, and adapt to future growth without requiring major changes too soon.